
(I actually wrote this post last year in 2016, but wasn’t ready to post it then – the experience was still too vivid and horrible!)
I recently finished sewing a pale, shell-pink Spring coat for my daughter for a birthday present. I’d been out shopping with her over the Christmas holidays and we’d seen a similarly colored coat that she’d loved. The cost of it was prohibitive and I thought to myself that I could make one for her. HA HA.

My lovely assistant on one of the kimonos I made.
I had just started sewing again after a long 15 year hiatus. I had a new sewing machine that purred like a dream machine, and I was feeling physically and mentally good enough to take on this project.
I had successfully made three kimonos from a traditional Japanese pattern for Christmas gifts, and I was on a roll.
I’d learned to sew from my mother who was a very experienced seamstress. She made most of my clothes while I was growing up, and throughout my twenties and thirties. She preferred sewing with Vogue designer patterns because they were pretty much guaranteed to look incredible when finished, and the directions were always clear.
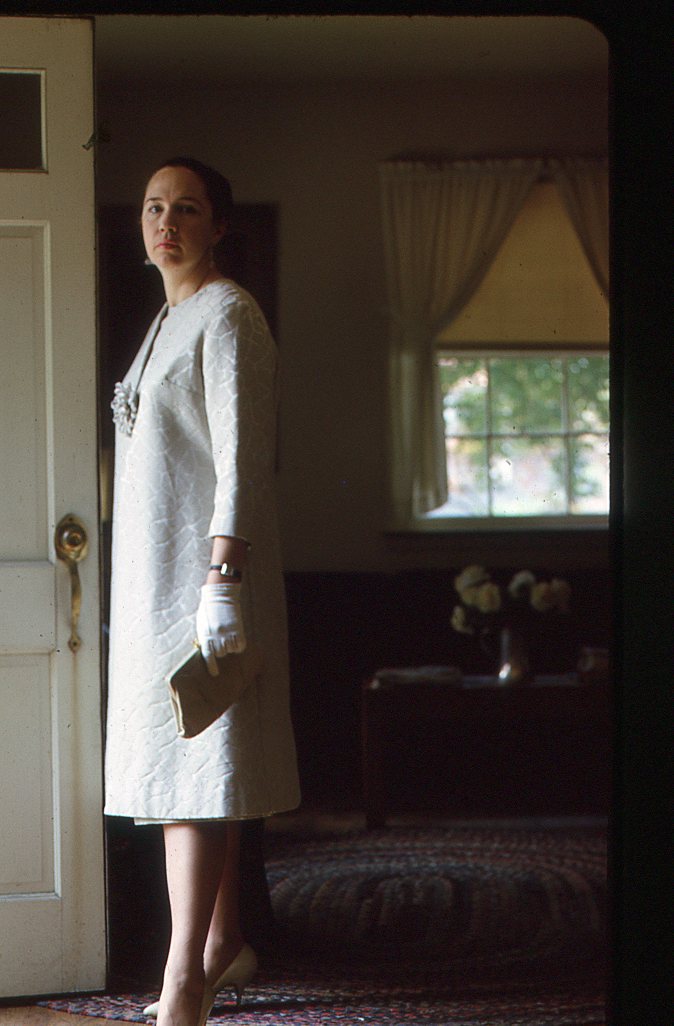
My mother in a Givenchy dress and coat that she made c 1965.
So in January of this year, I was at a fabric store and there was this beautiful, pale, shell-pink, soft coating on sale for 50% off. It was brushed and had a nap, and it felt like mohair even though it was synthetic. I eyed it for a while and then told the sales lady about my wanting to make a coat for my daughter.
She instantly suggested a pattern and in minutes had me buying the fabric, lining and interfacing, buttons and thread, and I was out the door with a heavy bundle to cut out and put together.
The pattern was a Butterick pattern and rated EASY.
Easy my foot!
If I hadn’t had experience with sewing and several reference books and the trusty internet, I never would have had the coat turn out as it did. There were a lot of tailoring issues that arose for which there were no instructions (such as having to reinforce the shoulder seams of the coat so they wouldn’t stretch and pull out of shape while supporting the weight of the skirt – or knowing how to baste and press the collar edge so that it would turn properly).

Butterick pattern B5824.
The lesson I learned was that I should not have relied on the instructions that came with the pattern. They were incomplete and did not take into consideration numerous problems of construction along the way.
I was almost completely finished with the coat when I discovered that the woman who’d designed the coat had a blog and she had done an online “Sew Along” with this pattern a few years ago. Had I known that this existed it would have saved me hours of sweat and agony. I learned from reading her posts that she had also found discrepancies in the pattern and had to figure out fixes along the way, just like me.
I feel badly for her – she designed this lovely coat, but the mistakes and omissions in the pattern are Butterick’s responsibility and what can she do about that? Not much.

The front of the finished coat. I ended up only sewing one button on and one snap underneath.
The coat has a huge, circular, swing skirt and is based on a 1950s Dior design. There were a lot of pieces to cut out and put together.
The first crisis happened when I was cutting out the coating fabric. I always find it a terrifying process to have to cut out each piece twice – one right way and one upside down, on a single layer of fabric. My fabric was 60″ wide and had a noticeable nap, and I could only lay out a couple of pieces on the floor at a time. I squished each pattern piece as close as possible to the next in fear that I wouldn’t have enough at the end of it all. And sure enough, I got to the end of the fabric and couldn’t cut the skirt front-facing on the grain. I had to turn it at a 90 degree angle and cut it. Luckily it was the facing and the nap wouldn’t show, but I worried that it would pull the wrong way.
It took me more than 2.5 hours to cut the pieces out. I measured and measured and pinned and repinned. I literally sweat buckets and had blisters on my hand by the end of it.
Even though the fabric had been half price, it had cost a pretty penny and I knew that there wasn’t much of it left, if any, at the store. And – there was a smudge of dirt along one side of the selvage (no doubt why it was 50% off, but it had not been shown to me at the store) so I had to be careful of cutting around that too – ugh.

Coat lapel
I was beat after that ordeal so I waited for another day to cut out the lining.
OMG. The woman again had cut me a piece of fabric just too-short for the layout of the pieces.
Were these too-short lengths of fabric due to the pattern guidelines or the sales woman? I was too distraught to figure it out.
The lining also had to be cut out one piece at a time on a single layer of fabric. The fabric was very lightweight and pretty, but it had to be cut so as not to cause fraying along the edges. And like before, I had to be especially careful to keep all the pieces on the grain of the fabric as marked on the pattern pieces. At the end of the length of fabric I had to scrimp and figure out how to fit in the final 2 pattern pieces. It was agonizing and I ended up with two skirt panels precariously cut upside down from the way they were supposed to lie, and with one of the panels not on the grain – it just wouldn’t fit any other way.
This was just the beginning.

The dumb pattern for the skirt lining was inches too short for the coat so I hand sewed the lace over the interfacing that they had me attach at the beginning of the project. The circumference of the skirt is several meters – times that by hand basting it 5 times to get all of this done and then hand sewing the hem and lace into place… ugh.
Each step of the process had challenges to face. One of the worst problems was the skirt lining – I’d cut it out according to the pattern as I said above, but when it was sewn together the length of each piece varied because all of the panels were on the bias and hung unevenly. There was no information in the pattern about this eventuality – but there are many posts online about hemming bias skirts. The most common advice was to hang bias cut, circle-skirts for weeks with weights hung on the bottom edge before trying to hem them; otherwise you end up with an uneven hem.
So I hung the lining for 3 weeks with weights on the bottom edge, and at the end of 3 weeks I measured it and measured it and measured it again, and then finally hemmed it as per instructions.
I was sure that it was perfect before I sewed it into the coat like the pattern said to.
Despite my best efforts the lining hem hung unevenly, and worse than that – it was inches too short for the coat thanks to the faulty skirt lining pattern pieces.
I got back online and read that the designer of the coat encountered this problem too, and her solution was the same that I came up with – to sew a wide band of lace onto the inside of the coat fabric to cover the unsightly interfacing that had been attached at the beginning of the project. The lace did the job – it covered the gap and the raw seams, but it took several meters to do it and had to be basted and then hand stitched on both edges: several extra meters of thread, a lot more sweat, and an added and unexpected expense.
That is an ENORMOUS and UNFORGIVABLE error for Butterick to make. The pattern is at least 4 years old and they haven’t bothered to add an amendment to the package to let you know about the incorrect pattern pieces!
Another major problem with the instructions – they assume you can make the button holes on your machine, so there is no mention, or option, of making bound buttonholes before putting the bodice together (which honestly never occurred to me because I was following their construction process step by step). I had finished sewing the coat at that point, and had no choice but to make machine-made buttonholes. In the end, this wasn’t even an option.

The sleeve lining stitched into place.
The buttons on the coat are meant to be big and decorative – larger than the maximum 1″ buttonhole that I soon discovered was the biggest size that my machine made.
When I realized my machine’s limitations, I did go out to get smaller buttons (which took me a long time to pick out, because that’s me at a fabric store). I practiced making machine buttonholes on layers of scrap fabric and they came out okay, so I went ahead to try and stitch one on the front of the coat.
It turned out that the fabric and lining together were too thick to make machine buttonholes, particularly because of the location of the buttonholes right above the waist seaming (even after my careful graduated trimming and pressing the bejesus out of it).
Imagine multiple pieces of spongy coating material joined together at the waist (8 skirt panels, 2 pockets and 2 front facings), add in interfacing, and then sew that onto a bodice that is thick with seams and darts. It was very tricky to join cleanly and even more difficult to trim.
And don’t forget that the lining was already sewn in place.
The machine jammed. The foot wasn’t feeding, and the stitches were impossible to completely remove from the delicate surface of the fabric. I was extremely peeved to have finished the coat so well up to this point, only to have the front and center of it marred by this disaster.
I steamed it – I painstakingly tried to remove the tight stitches – I brushed it – I cried – I swore… nothing made it perfect again. So I gave up trying.

The only solution I could come up with – a giant heavy duty snap.
I called three tailors in the City to see if they’d make my buttonholes. Nope. No one would do it.
I had no options left so I went out and bought a big snap and sewed that into place.
I then sewed a large button over top of it on the outside, for decorative purposes only.
After a final pressing, the coat was at last done, and all I could see were the problems that I’d had making it.
The coat weighs a ton because the skirt has so much yardage in it. (It actually weighs more than my big arctic, down-filled, winter coat.)
I mailed the coat to my daughter and thank goodness it fit, and she likes it, and it looks beautiful on her. So I guess “All’s Well That Ends Well”.
But its going to be a very, very long time til I ever buy a Butterick pattern again.


I haven’t sewn for a few years now, but I always remember my Mom (a great seamstress like your Mom) saying to me that it’s worth getting an extra half yard or yard of fabric and lining materials at the time you buy them because it’s never the same when you actually get down to cutting as it is for the designers. I’ve followed that advice over the years and still fell short once! But in general it’s been great and very helpful advice.
The coat is gorgeous. How lucky your daughter is to have such a beautiful, hand-made garment. Even better, your love and effort is in every stitch. That is irreplaceable.
Love, Ilene
>
Thanks Ilene – it’s a lesson learned and good advice that you share, but I still harbor a grudge against the pattern company, especially since the designer herself had to write all the construction details in her blog posts, and even she had problems with the way the pattern was cut at the factory!
The coat looks lovely, despite the ordeal.
Thank you Alethea – it is lovely, but I still have trouble looking at it without seeing all the problems…
Elisabeth – I so feel for you! I’ve had similar experiences with patterns before, plus they never fitted properly, only to discover when the garment is fully finished! Something would always pull under the arms, bulge or sit uncomfortably. I had so enough of it that I went and became a qualified tailor myself… just so I could make patterns that would fit perfectly from the first fitting. I reviewed many commercial patterns since, but always found it easier to make my own, especially for the person AND for the material. Then problems like you had with the button, would not occur because I’d think about it while making the pattern.
Anyway, sorry for the runt. 🙂 Congratulations on your incredible perseverance! That coat turned out extremely well, in spite of all the hurdles you had to overcome along the way. I’d say you definitely CAN make coats! 🙂
Oh my goodness I just bought this pattern to create my dream coat now I’m scared 😟
I will do a Muslin for sure
If you look online there is a tutorial for making the coat that the designer did – if I had known about it I would have followed along and had many less problems with the coat. All in all, it turned out beautiful.
Wow. Just…wow. I love this coat and am determined to have it in my closet, but I’m printing this and keeping it (along with Gertie’s Sew-Along) in with the pattern. A friend once toured one of the major pattern companies and found out why the instructions are usually so insufficient; the garment is made, given to the instruction writers, and they have to figure out how the whole thing happened. The process is backwards, and it shows. It adds a feeling of triumph any time I get to say, “I made it!”
I made this coat a few years ago and I had a lot of the same problems. I was stunned when the lining that I’d painstakingly cut out and sewed together was so short. I ended up making a floating lining tacked at the seams AND I had to shorten the coat to close the gap. As for buttonholes, the fabric was too thick for my machine so (after lots of practice) I made bound buttonholes for the first time on a coat. I can’t remember the other alterations I had to make, but I do remember being frustrated.
That said, my coat turned out beautifully and I got a lot of compliments on it. I’d definitely make it again knowing what I’d need to do (and avoid) to get a good result.